

AWS Elastic Beanstalk and Deployment
Introduction to ELBeanstalk and what is it for API Devs


Table of contents

No headings in the article.
Before going directly on a high-level let us understand from the basics from a beginner perspective.Let us start with IAM and Best Practices and then one by one we will be moving on to other processes.
IAM and Best Practices:
AWS Identity and Access Management (IAM) is a web service that helps you securely control access to AWS resources. With IAM, you can centrally manage permissions that control which AWS resources users can access. You use IAM to control who is authenticated (signed in) and authorized (has permissions) to use resources.
3 main important prequisites:
Create an IAM Group- With the name 'Developers' - with admin access.
Create and IAM User- with group developers
Login with IAM User - ex: developers_dev
Browse To IAM:
Step1: Choose User Groups and then assign name(ex: Developers) -> Attach Permission(select Administrator Access) -> Create Group
Step2: Choose Users -> assign name(ex: developers_dev) -> Now Create Custom Password -> Next: -> Add User: Add User to group->Create User
After the above operations are completed:
Browse into your IAM as follows:
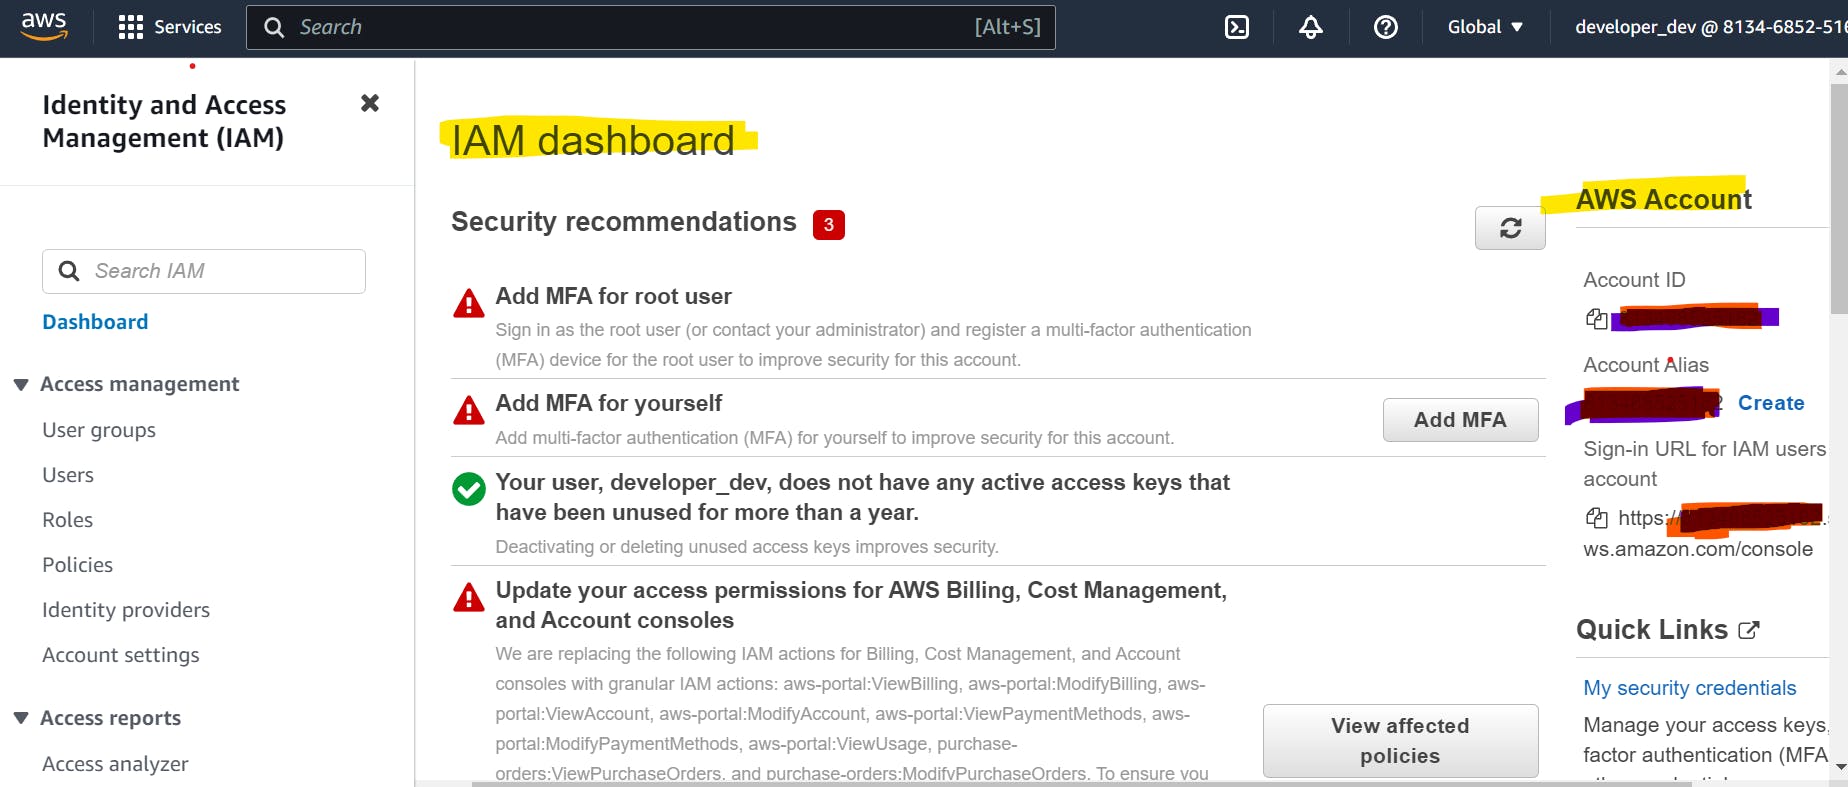
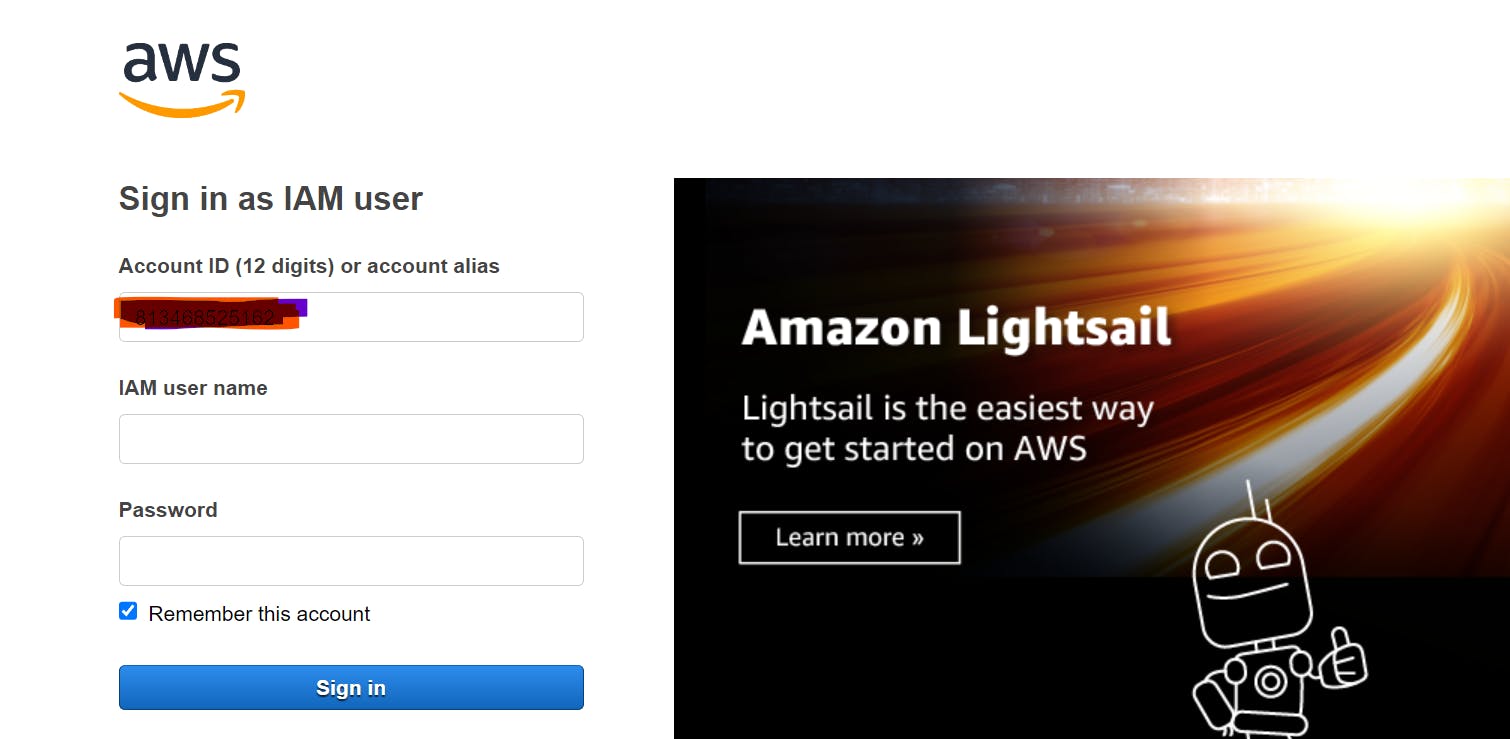
Now see there is a Sign-in URL in the RHS. Copy that and open in the browser in a new tab. Then sign in with the IAM username and password:
After sign-in -> Browse Elastic Beanstalk:
Before that Lets Understand what Elastic Beanstalk is:
Elastic Beanstalk is a service for deploying and scaling web applications and services. Upload your code and Elastic Beanstalk automatically handles the deployment—from capacity provisioning, load balancing, and auto scaling to application health monitoring.
Now we have to Create an Application in the EB:
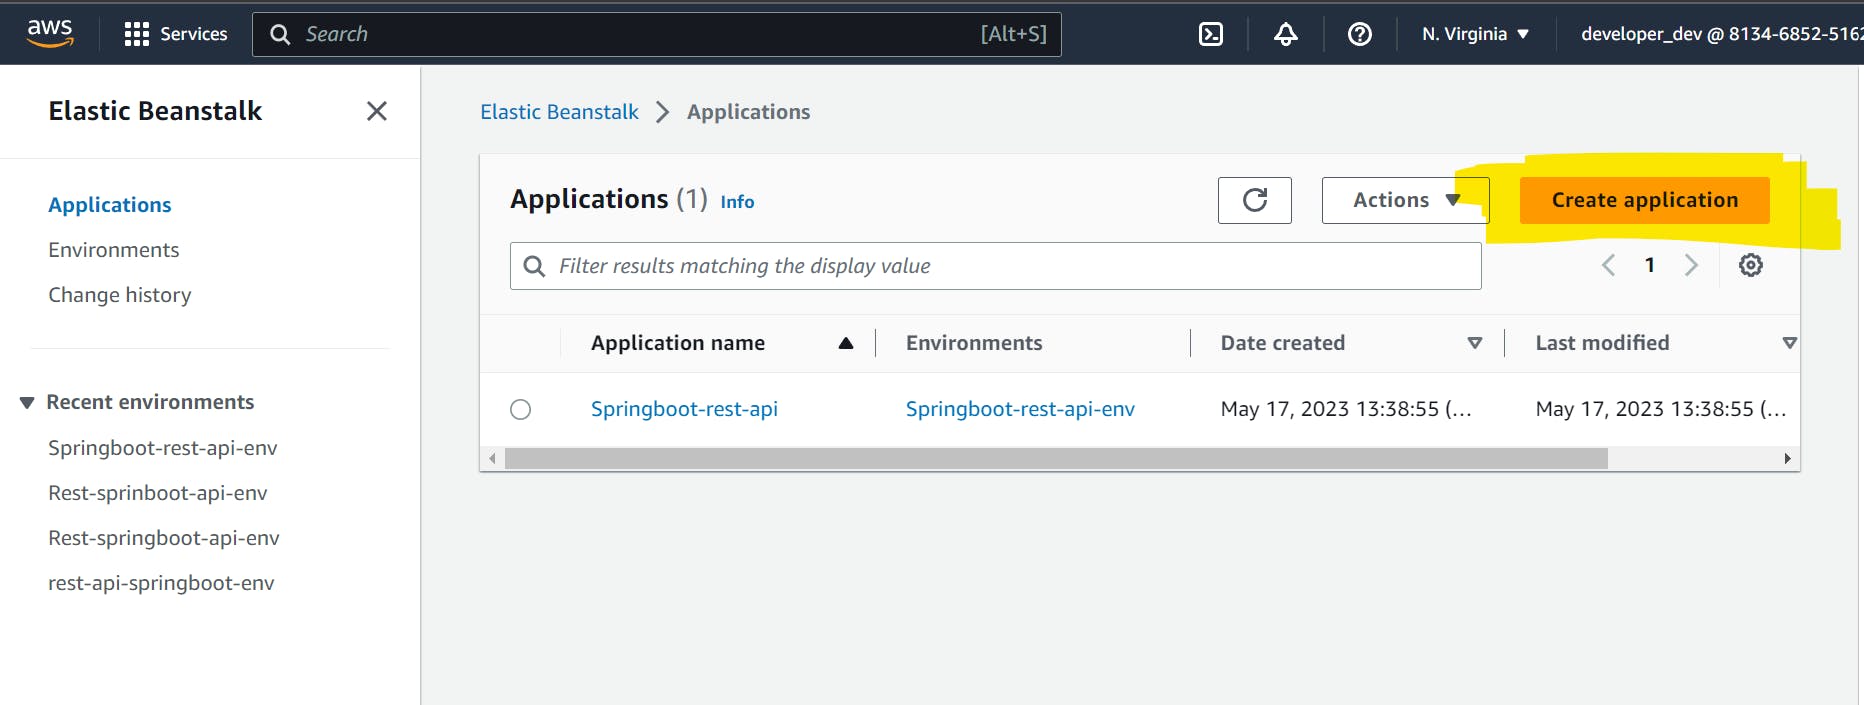
Click on Create Application:
Then assign an application name - for example: Spring-rest-api (see the one which is already created in the snapshot)
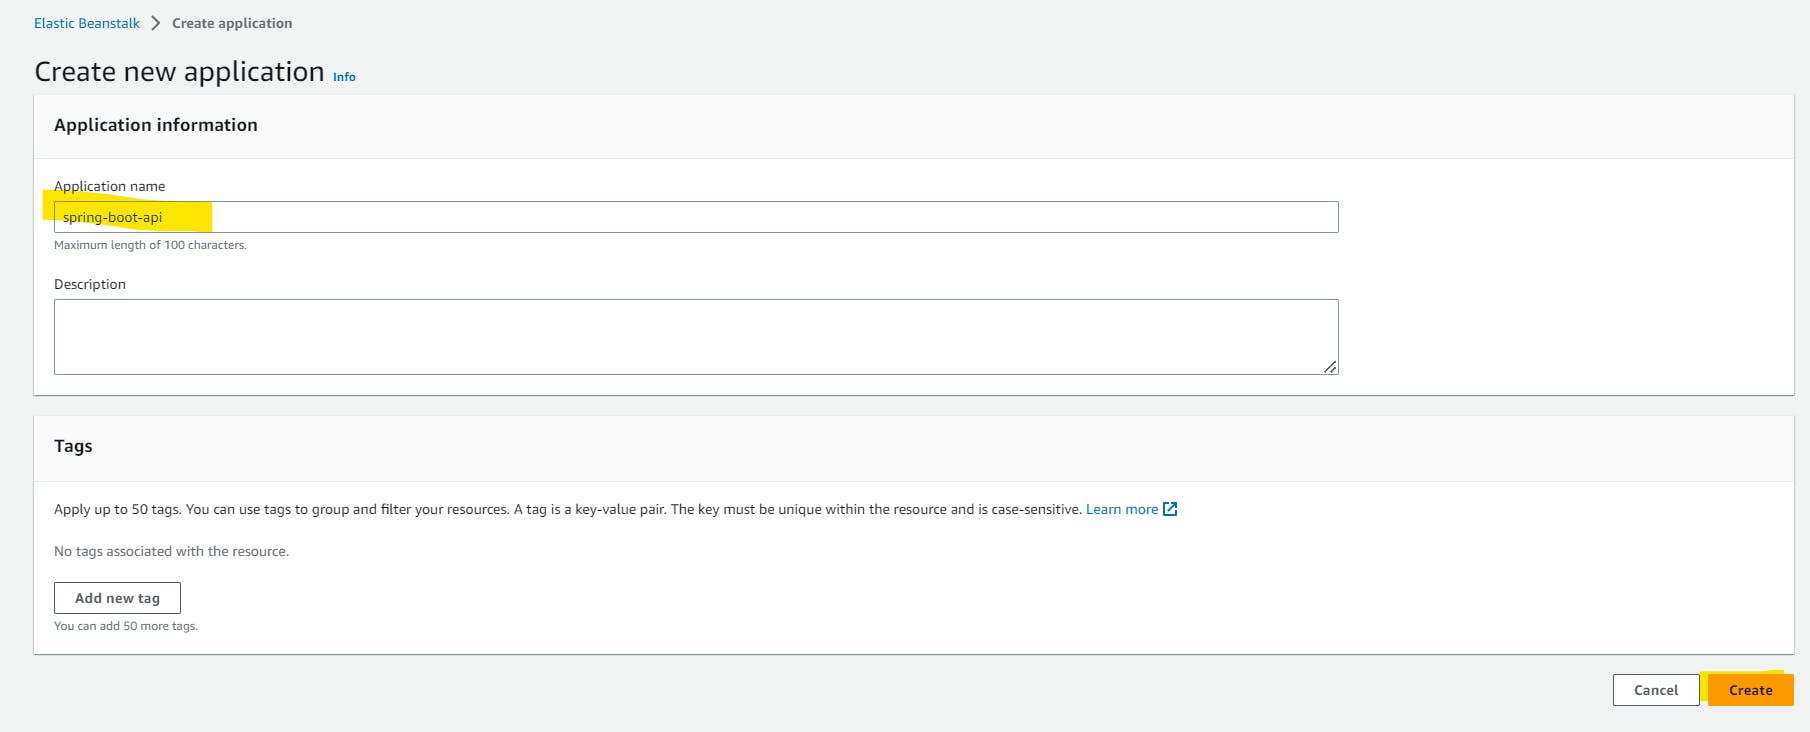
Click on Create -> and once done you can see your application being created on the dashboard.
Once done - it will ask you to create Environments.
Hence, Click on create new environment:
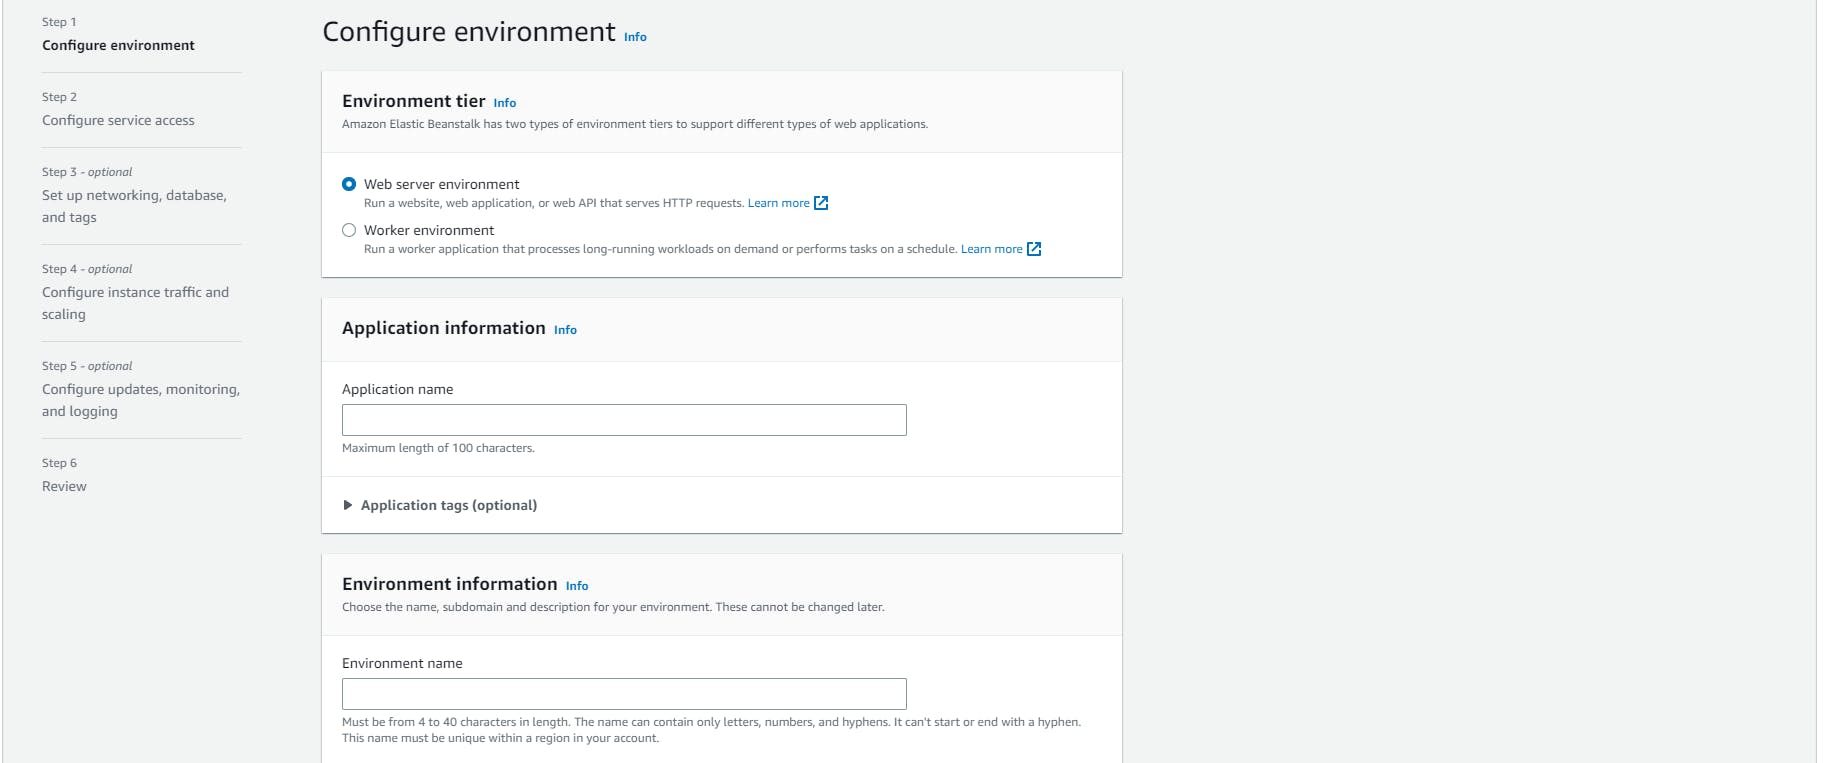
Fill the details:
Environment Tier: Web Server Environment
Application name: <provide the name of the application that you created>
Environment Name: <give a environment name>
Platform Type: Managed Platform
Application Code: Sample Apllication
(Select JAVA for now in frameworks/language)
NB: There are other languages as well, but as this is Java specific blog- I have selected Java.
Click :Next

Now for the above steps:
*Provide a EC2 Key pair - of one of the EC2 instance that you have
* Provide the EC2 Instance profile as well!
Once done -> Click on Skip To review and create your environment.
Once done wait for some time - to configure the env(3-4mins) and check the status : Health of the env. If Ok then you are good to go for the next process!
Now:

Now lets begin the reality:
Click on -Upload and Deploy (for deploying your own code into the ELB)
As a prequisite - please be ready with the deployable jar file of your spring boot application.
Example in my case: C:\Users\deept\OneDrive\Desktop\New folder\deploy-spring-boot-aws-eb\01-spring-boot-hello-world-rest-api\target\01-spring-boot-hello-world-rest-api-0.0.1-SNAPSHOT.jar
We will be deploying the above 'hello world' Api to ELB.
Once you click on Upload and Deploy->
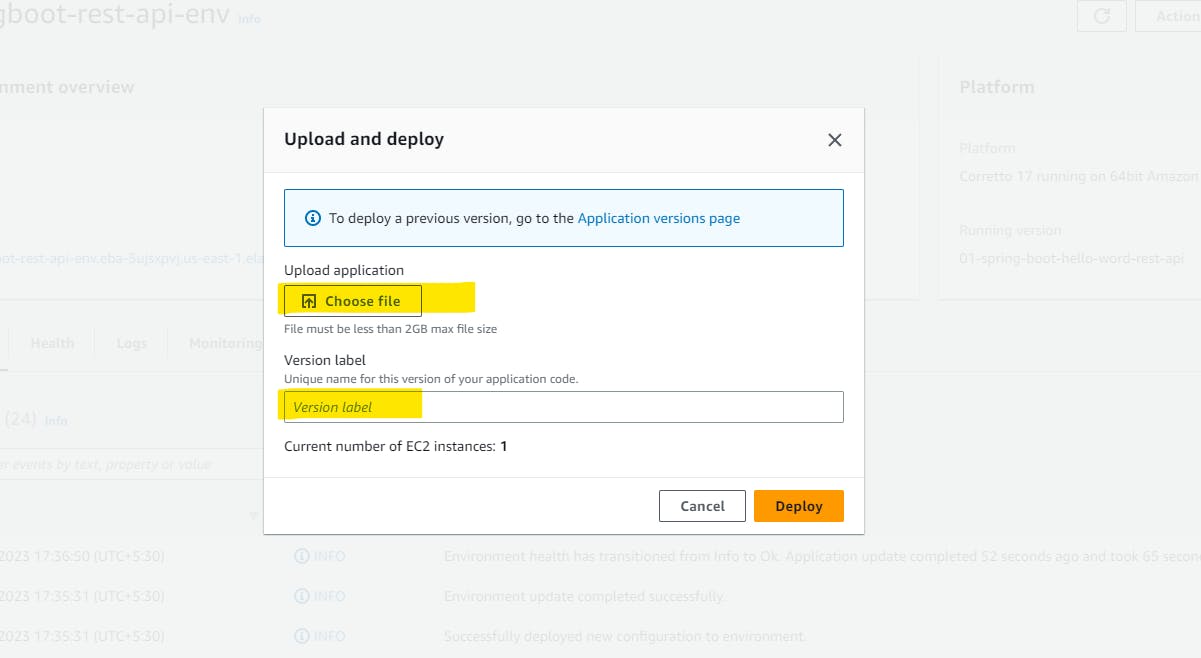
Choose the JAR file and attach + add a version label name to the same!
Wait for some time for the file to get deployed! And Ya you are done!
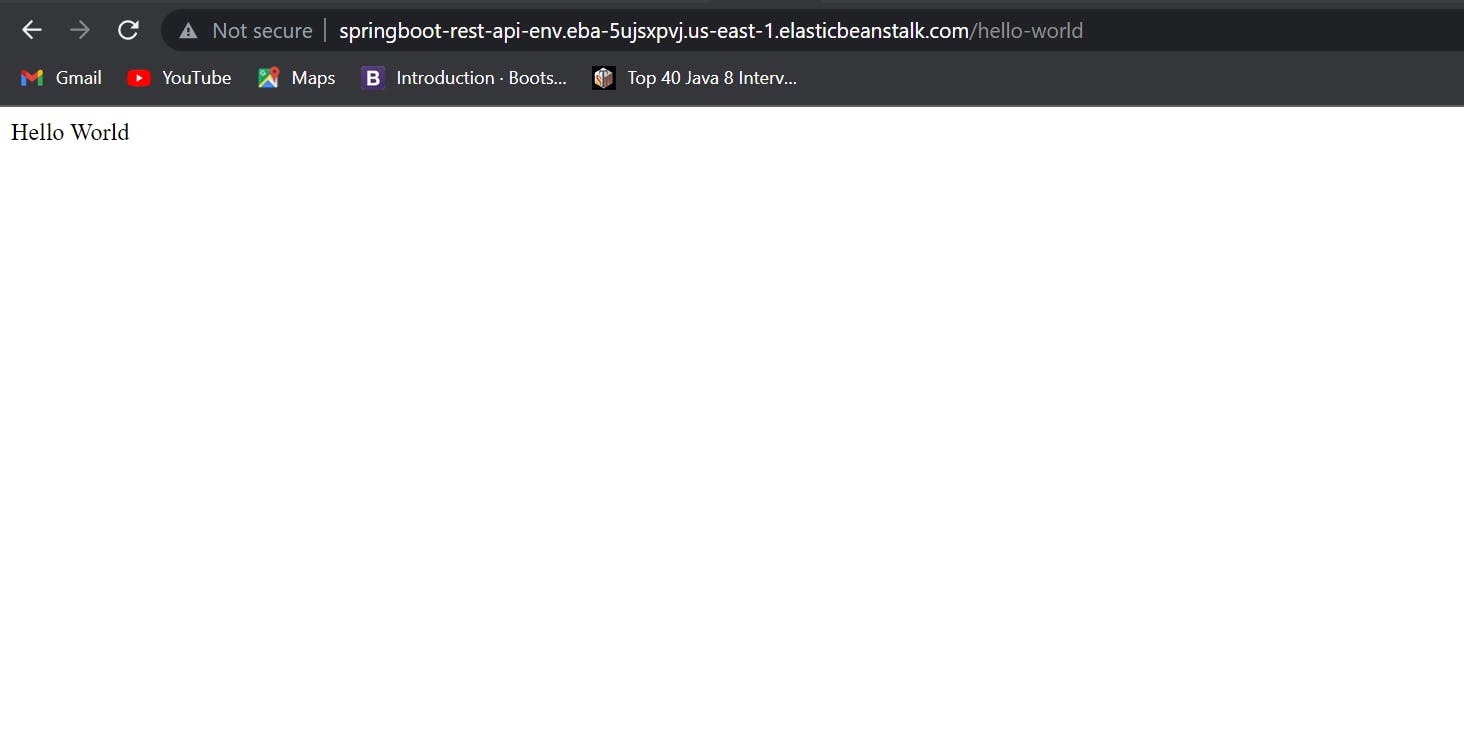
Testing:
From the dashboard you will be finding the Domain Link.
Open the domain link into the new dashboard -> append /<your_endpoint_name>
and ya you can succesfully see your output as I did!
Thank You!